
I. “Water First, Then Compost”: A Lesson From My Dad’s Garden
“Water first, then compost, then care, and lastly, the seed.”
That’s what my dad always said whenever we worked in the garden together. In his view, to grow healthy plants and have a good harvest, water was the top priority, followed by compost (or fertilizer), then steady care, and finally, the quality of the seeds.
A great seed can’t produce sweet fruit if the soil is poor, the plants aren’t watered regularly, or weeds are left to take over.
Have you ever wondered how forests manage to stay so lush and full of life, even though no one takes care of them? Not only do trees survive, but forest soil is often rich, fertile, and teeming with life—unlike many farmlands that grow more depleted each year.
The secret lies in nature’s perfect composting system: fallen leaves, broken branches, animal droppings, and decaying organisms all accumulate on the forest floor. Slowly, microorganisms break them down into nutrient-rich humus.
That’s organic compost—the best fertilizer nature has to offer.
And the beautiful part? You can recreate this very process right in your own backyard—by learning how to make a compost pile.
Before writing this, I did wonder: can a written guide really explain how to make a compost pile as well as a video could? After all, DIY content is often easier to follow with visuals.
But for this topic, I honestly believe an article works better. Videos show you the steps, but writing helps you understand the “why” behind them. That understanding gives you the flexibility to adjust your compost pile based on the materials you have, your local climate, or even the size of your space.
In this guide, I’ll break down the core principles, share real-life tips, and help you build a compost pile that fits your backyard—whether it’s a small corner or a full-sized garden. Let’s start with the basics, and build something truly sustainable.
II. What Is a Compost Pile & Should You Make One at Home?
1. How Does the Composting Process Work?
When you mix nitrogen-rich materials (like vegetable scraps, grass clippings, fruit peels, or chicken manure) with carbon-rich ingredients (like shredded paper, sawdust, or dry straw), microbes get to work.
Under the right moisture and oxygen conditions, they start breaking down complex organic compounds—like cellulose, lignin, proteins, and fats—through an aerobic decomposition process.
Throughout this process, several key microbial and chemical reactions take place:
• Microorganisms break down the organic matter, producing organic acids, carbon dioxide, water, and heat—sometimes raising the compost pile’s temperature to 120–160°F (50–70°C).
• These byproducts continue to decompose into humus—that rich, dark, crumbly material plants absolutely love.
• Beneficial microbes like actinomycetes and fungi also help stabilize the compost, break down manure, and eliminate pathogens.
In short: composting is a natural recycling system powered by microbes, turning waste into valuable soil nutrients—just like nature has done for millions of years.
If you want to succeed with composting, your job is to create the best environment for those microbes to thrive so they can break things down quickly and efficiently.
2. So, Should You Make a Compost Pile at Home?

If you’ve got a backyard, or even just a small garden corner, building a compost pile is absolutely worth a try.
It’s one of the simplest ways to reuse your kitchen and yard waste, cut down on trash, and produce nutrient-rich organic fertilizer for your plants—for free.
That said, composting isn’t just a matter of tossing everything into a pile and walking away.
To make a compost pile that decomposes properly, stays odor-free, doesn’t attract pests, and turns into fluffy “black gold,” you’ll need to understand how to balance ingredients, maintain moisture, and care for your pile over time.
That’s exactly why I wrote this guide—for anyone who loves growing food, keeps a few backyard chickens, or simply wants to rebuild their soil using the very waste they produce every day.
With a bit of knowledge and some patience, you’ll turn trash into treasure—and your garden will thank you.
III. How to Make a Compost Pile at Home
Step 1: Prepare Materials & Choose the Right Spot
Before you start building your compost pile, you’ll need to prepare two essentials: the right materials and a suitable location.
1. Materials – You Need Both “Greens” and “Browns”
A well-functioning compost pile depends on a balance between two types of organic materials:
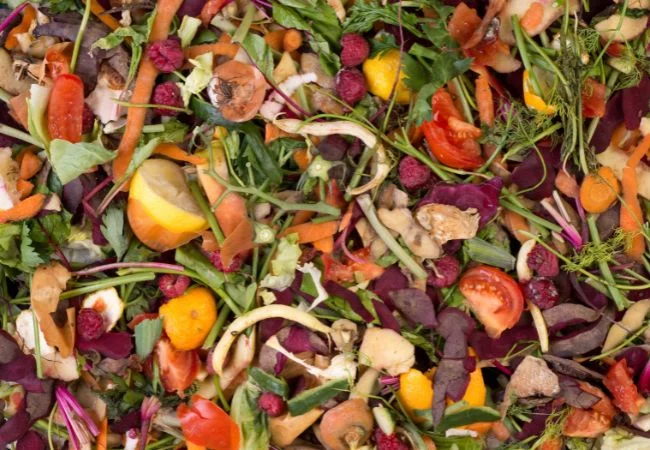
• Greens – rich in nitrogen:
These include kitchen scraps, fruit and veggie peels, coffee grounds, fresh grass clippings, and soft green leaves.
➤ Greens help heat up the pile and kickstart the decomposition process.
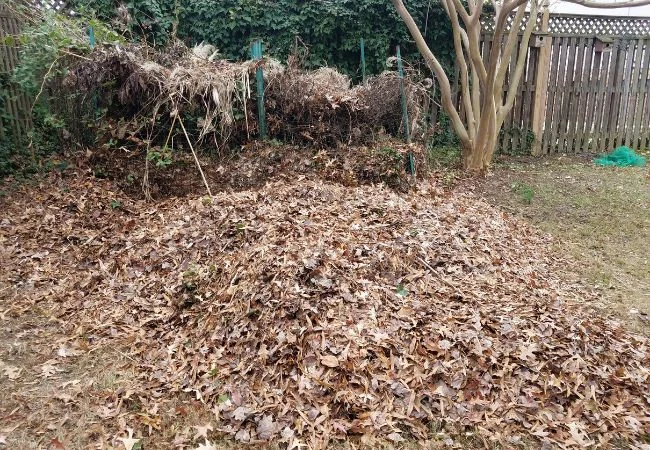
• Browns – rich in carbon:
These include dry leaves, twigs, shredded newspaper, cardboard, straw, and sawdust.
➤ Browns provide structure, absorb excess moisture, and help control odor.
👉 The ideal ratio is about 2–3 parts browns to 1 part greens by volume. But don’t stress over exact numbers—many times I’ve gone with a 1:1 ratio and it still worked fine. Just keep in mind:
• Too many greens = wet, smelly pile
• Too many browns = slow decomposition
🔍 Tip: Chop materials into small pieces. The finer they are, the faster they break down—microbes can access them more easily.
❌ What Not to Add to Your Compost Pile
Although a compost pile can “digest” a lot, there are certain things you should avoid:
• Meat, fish, bones, and fats – cause bad odors and attract flies, rodents, or wild animals.
• Dairy products (milk, cheese, butter, yogurt, cream) – can sour, smell, and disrupt microbial balance.
• Pet waste (from cats or dogs) – may contain harmful parasites and bacteria.
• Toxic or diseased plant leaves (e.g., oleander, neem, castor) – may release harmful substances or spread disease.
• Citrus peels, eucalyptus, lemongrass, or tea tree leaves – the essential oils can harm beneficial microbes.
• Coal ash or chemically-treated wood/paper – may contain heavy metals or toxins.
• Weeds with seeds or diseased plants – can spread in your garden if the pile doesn’t get hot enough.
• Glossy, colored, or chemically coated paper/wood – are difficult to break down and may be harmful.
2. Location – Often Overlooked but Super Important
Choose a well-ventilated spot, ideally with partial sunlight, no standing water, and slightly hidden to maintain your yard’s appearance.
• Avoid placing the compost pile directly against a wall or in a low-lying area—these trap moisture and reduce airflow.
• Ideally, place it on bare soil, so native microbes and worms can join the process. If you must place it on concrete, add a base layer of twigs or straw to help with aeration.
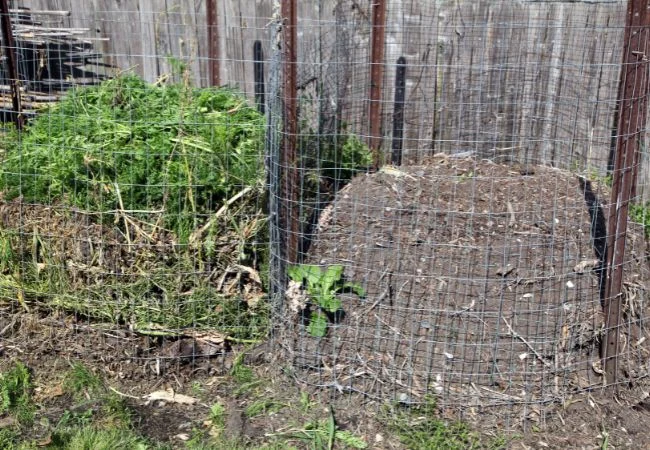
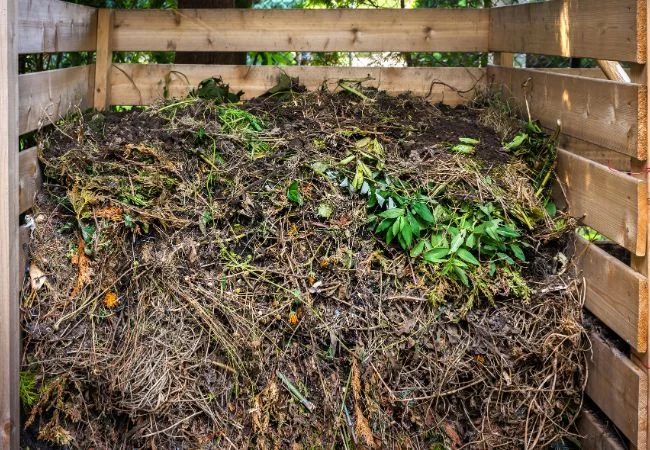
Step 2: Build the Compost Pile – Layering & Starting the Breakdown
Once your materials and location are ready, here’s how to build your compost pile:
1. Layer It – Use the “Brown–Green–Brown” Method
Stick to the golden ratio: 2–3 parts brown to 1 part green by volume. Layering helps air circulation and speeds up breakdown.
Layering steps:
• Start with a bottom layer of browns (about 3–4 inches thick) for airflow.
• Add a layer of greens (around 2–3 inches).
• Continue alternating brown and green layers until the pile is 3–5 feet tall.
• Finish with a top layer of browns to seal in moisture and control odor.
💧 Water matters!
As you build, lightly water each layer. The goal is moist like a wrung-out sponge—not soaked. Too wet and it smells, too dry and it stalls.
💨 Oxygen is essential too.
Don’t compact the pile—leave it loose and fluffy to allow air flow, which helps the microbes thrive.
2. Add Some “Compost Starters” to Speed Things Up
To jumpstart the decomposition process, you can add:
• A scoop of aged manure (from chickens, cows, rabbits…)
• A layer of topsoil from your garden (especially rich, crumbly soil)
• A handful of finished compost, if you have any left from a previous batch
These contain active microbes that will help get your compost pile going faster and more efficiently.
Step 3: Monitor & Maintain Your Compost Pile
After setting everything up, the composting process begins. Now it’s all about checking in regularly to keep things on track.
1. Check Temperature & Smell
• During the first 1–2 weeks, a well-built compost pile will heat up in the center. This “hot phase” is a sign that microbes are breaking things down fast.
➤ Large piles can reach 120–160°F (50–70°C).
• After that, the pile will gradually cool as materials decompose.
✅ Signs of a healthy compost pile:
• Earthy, slightly musty smell—like a forest after rain
• No strong odors (no ammonia, sour, or rotten smells)
❗ If it smells bad, it’s likely too wet or has too much green material.
2. Adjust as Needed
• Too dry? Add water slowly and turn the pile to mix.
• Too wet or stinky? Mix in more browns like dry leaves or shredded cardboard, and aerate.
• Fruit flies everywhere? Cover with an extra brown layer to reduce access.
3. Be Patient – Compost Takes Time
• If you’re turning the pile regularly and managing moisture, you might get finished compost in 6–8 weeks (in warm months) or 3–4 months (in colder seasons).
• If you let it sit without turning, it may take 5–8 months to fully decompose.
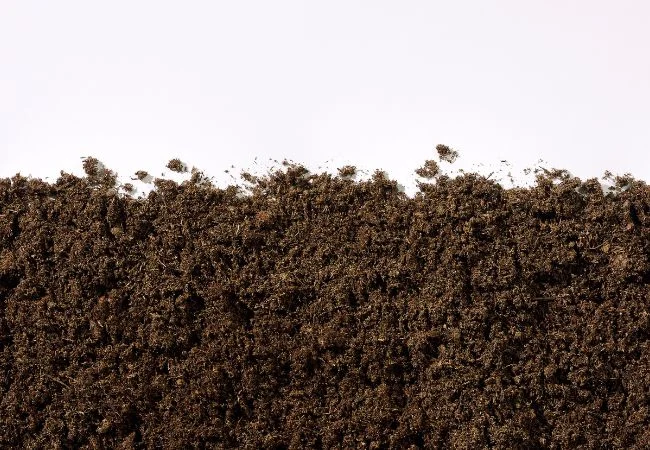
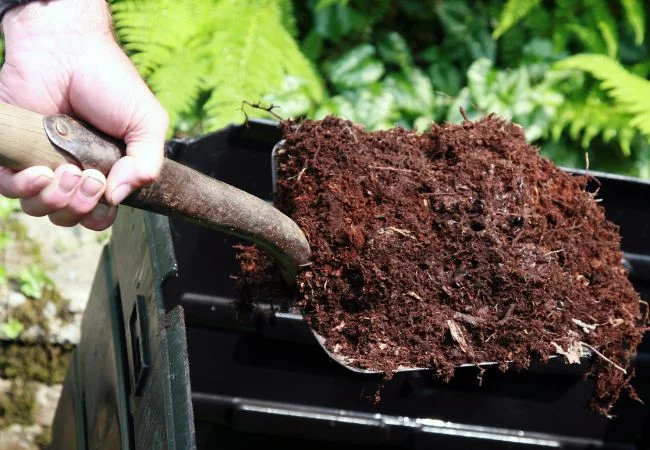
4. How to Know When Compost Is Ready
Look for these signs:
• Dark brown or black color, crumbly texture like rich soil
• No visible scraps—no bits of food, paper, or leaves left
• Mild, earthy smell, not sour or funky
IV. Composting a Small Amount? Try a Compost Bin
As you’ve seen, compost piles are great if you’ve got a big backyard, a steady flow of organic waste, or you’re raising chickens and tending your garden daily. But what if you’re working with a small balcony, a tiny yard—or just want to start small and see how it goes? That’s where compost bins shine.
❓ What Is a Compost Bin?
Simply put, a compost bin is a container—usually made of plastic or wood—that holds your compost materials in a more compact, enclosed system. It can be a stationary bin or a rotating tumbler. The decomposition process still relies on microbes breaking down organic matter, just like in a compost pile. The difference is in how it’s contained and managed.
✅ Benefits of Using a Compost Bin
• Better Heat Retention: Microbes thrive in warm, stable environments. A closed bin holds heat better than an open pile exposed to the elements.
• Moisture Control: With a lid and walls, moisture loss through evaporation is reduced, and rain can’t oversaturate the contents.
• Cleaner & Neater: No exposed food scraps, no bad odors, no fruit flies—if balanced properly and kept covered.
• Easy to Move: Smaller bins can be tucked away in any corner of your yard or even on a balcony.
• Beginner-Friendly: It’s easier to manage and learn composting on a small scale.
⚖️ Compost Pile vs. Compost Bin: Which One’s Right for You?
Criteria Compost Pile Compost Bin
Space Needed Large (yard/garden) Small (balcony, backyard corner)
Waste Volume High Small to Medium
Aesthetics Low (needs screening) High (closed, tidy)
Decomposition Speed Moderate to fast (if turned regularly) Faster with good control
Upfront Cost Almost none Requires a bin or container
Best For Gardeners with space & lots of organic waste Beginners, urban dwellers, small households
♻️ One Crucial Note for Bin Composting
No matter what type of bin you use—DIY plastic tubs or store-bought tumblers—remember this: compost microbes need oxygen to survive and work efficiently. Without it, your compost turns anaerobic, causing foul odors, slow breakdown, and even methane gas.
👉 So be sure to drill ventilation holes around your bin—on the sides and bottom—to promote airflow. Also, regularly mix the contents (for fixed bins) or give it a few spins (if using a tumbler) to oxygenate the inner layers.
While bins with lids are cleaner and more attractive, from my own experience, a breathable cover like a burlap sack or breathable tarp often works better at maintaining the right balance of moisture and airflow.
V. 🎯 Final Thoughts: Composting Is All About Feeding Microbes
If I had to sum up composting in one sentence, it would be this:
You’re creating the ideal environment for microbes to thrive and do the work for you.
Let’s break that down:
• Greens and browns (food scraps, dry leaves, etc.) are the food source.
• Water is essential—not just for softening materials, but because microbes need moisture to survive and multiply. Without enough water, they can’t function.
• Oxygen is their lifeline. Aerobic microbes (the good ones for composting) need oxygen to breathe, grow, and break down materials efficiently. Without it, compost turns anaerobic—leading to smells, poor breakdown, and low-quality compost.
When you get the balance right, millions—if not billions—of beneficial microbes flourish inside your bin or pile. Over time, they’ll break everything down into fluffy, nutrient-rich humus that your plants will love.
Why Don’t Forests Need Fertilizer?
At the start of this post, I asked:
Why do forests thrive without watering, fertilizers, or human care—yet the soil never runs out of nutrients?
The answer lies in nature’s own compost system.
Every fallen leaf, broken branch, spoiled fruit, or animal droppings become food for billions of soil microbes. With rainwater, oxygen, and time, these microbes slowly transform organic matter into a rich, spongy humus—the ultimate slow-release fertilizer.
That’s nature’s compost pile.
And the amazing thing? You can recreate that same process right in your backyard. Whether it’s a classic compost pile or a compact bin, you’re building a miniature ecosystem—one that mirrors the forest floor.
👉 Once your compost is ready, the next big decision is how to use it effectively—especially in raised garden beds. We’ve covered everything you need to know in our full guide: Best Materials for Raised Garden Beds.
If you really want to dive deeper into how microbes work and how to build your own “compost ecosystem” at home, I highly recommend a great book. I read it back when I first started composting, and I still refer back to it now and then:
👉 Let It Rot!: The Gardener’s Guide to Composting by Stu Campbell